Friday, July 3, 2009

What an idea!!

So, I have been having trouble keeping track of all my clear stamps. As some of you clear stamp users they don't always stay on the plastic sheet they come on. So, I have lost the letter "P" in my alpha collection. I am hoping that I will find it soon. I am sitting here stamping (which by the way I don't do often) enough however, for some of the stamps not stick back on to the plastic sheet they came on. Here is what they look like when you them at the store.

I don't have the room for the storage binders for these stamps, as my Scrapbooking studio shelving is all full with boxes and other cute stuff. So, here is the SUPER cool, cheap, and fun way to organized way to store them. In the jewel cases of old Cd's. If your like me all my Cd's have been uploaded and converted to MP3's on my computer and then my Cd's are all in CD storage books. So your left with a bunch empty cases with nothing to do with them. I am glad that I never tossed mine.

Here is what I did:

I took clear cases took the covers out (tossed the paper part only on ones I didn't actually care about you like the Spice Girls or the Macarena Club Mix or Bobby Brown) hey no judging I was just a teenager I bet you ladies have some bad ones too . Anyway, take the CD holder part off so you get to the back of the jewel case and the back art out. Now you have just a case, now stick the stamps on there as if you where putting them back on the plastic sheet. See picture below.


I am even going to decorate the cases and make sure that I put all like items together. All the alphas, party, and journaling stamps.
A happy day is a day crafting (scrapbooking)!!
Katie Did!!

Thursday, June 18, 2009

Getting Crafty for a Cause!

Well, here I am two days in a row of blogging. I just thought that I would share some fun photos of tye dying and painting of t-shirts that my family is going to wear when we do our 5K Walk. On Father's Day my family and I are going to be joinging hundreds of other people who want to raise money and awareness for Prostate Cancer research. We will be Runing (in our case walking) for the Ribbon. To find out more about it you can go to MIURunfortheRibbon.org
So, as the "team leader" really just the one that found out about the event. I decided that we needed to have matching T-shirts, so I enlisted the help of a friend for a night of beer, tacos, and tye-dyeing and here are a few of the the steps and what they look like.
This is my friends garage. (cool flames right, she did those by hand talk about a handy crafter). The shirt is pretty cool too. This is the pile of them after we took the rubber bands off. Here is a tip for tye dying: after you rinse them well in the bucket you dyed them in wash them in the washer with warm water and laundry soap with a couple splashed of white vinager. (this helps set the color.


Now, here my mom and I are painting the back of the tee with our team name and the year. Go TEAM JACKSON!!!

Here is what the back of the t looks like:


After the race and when we are all in our shirts i will post a picture!!


Go Team Jackson!!!


Wednesday, June 3, 2009

You've Got Mail!!!

Wow, it has taken me a while to get back into blogging. I promise going forward I will do more. I have had a hard time getting motivated but I think the mail a couple of days ago really helped me out.


I love when I get good mail. This is my favorite peice of mail in a long while.
It has inspired me to get crafty agian and finish projects that I have started and start new ones.
What is everyone working on? What is everyones goal for the summer. Mine is to start and finish my recipe book and my computer bag.
A happy day is one spent on your hobby!
Kate

Wednesday, May 13, 2009

Something Fun For Coffee Lovers!

I don't have a lot of time today as I am getting ready for my huge blowout of a yard sale. But here is my project from this week and a nice mother's day gift for my mom! And my first official quilted fun:)


I made a coffee corset cozy! I took the scraps of my previous project (magnet and cork board covers) and a template I found online (you can also use a Starbucks paper one). You can even use a fat quarter if you don't have any scraps. You will also need some sort of batting or backing to stiffen the fabric.


1. Using the coffee cozy template cut 3 pieces 1 out of the batting 2 out of the fabric of your choice


2. Pin all three layers together: batting on the bottom, outside fabric in the middle right side up, and fabric lining on the top with the right side down.


3. Sew all the way around leaving a 1/2 inch seam allowance and an opening for turning.


4. Trim seams to a 1/4" except at opening.


5. for the corset look trim ends about an 1 1/2" from each side sew the ends together


6. turn the right side out and sew the whole closed by doing top stitching all the way around.


7. get some ribbon and lace like a shoe with the bow at the top.


here is a template for this:


A happy day is a crafty day!!
Kate


Thursday, May 7, 2009

Getting Crafty!!

Well, I sure do love crafting. I am really starting to enjoy sewing, which is quickly becoming one of my 3 favorite hobbies. I didn't really enjoy sewing when I was growing up and I think that is mostly because I found it very annoying and fustrating. Now, I have made some basement curtains (with the help of my mom) who rocks at quilting, and I have made a cover for a magnet board and a cork board. Which is really nice. Here are the befores and afters.


These are the matierals that you will need for each board:

1 yard of fabric
3 yards of ribbon
1 metal piece
1 foam core 2 inches bigger than your metal piece
spray adhisive
duct tape


Here is what I did wrong on both the boards, both involving the ribbons. Cut the ribbon to 3 eighteen inch peices. Then pin them to the right side of the fabric, making sure they are spaced out equally (this is for hanging). Sew! Step 2 is piecing the front and back together (making sure you pin the right sides together. sew! leaving one side open so you can place the board inside the cover. Hand sew the side closed and you will have a completed project:)


Finished product!!


A Happy day is a day spent doing what you Love!

Happy Day!

Kate

Monday, April 13, 2009

All Cleaned Up!

Sew I am all cleaned up and ready to start my next project. My next project is going to be a sewing one.

The above picture is going to be my sewing table. that is where I am going to set up the sewing machine. I am really looking forward to this sew it should be fun.


Here is the working area I will be cutting and tracing or assembling my project.


A Happy day is a crafty day!!


How do you keep your creative space...

So, the question of the day is: How do you keep your "work space" clean before, durring and after projects. My space always seems to collect all the junk in my house that doesn't seem to have a home. It really bugs me how everything ends up in my office/creative studio. How am I suppose to get anything done...LOL all I seem to do is clean my space. Anyway, here is my messy creative space. I know what I am suppose to do, is clean between all projects but sometimes I start a project and then before I finish I move on to something else...


This is the desk to the right of my main work area it is so messy. I think that what I need to do is actully finish all the projects that I have started or stop buying new stuff for new projects.


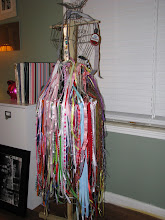
This is my actual work space, still very messy I guess I just need to put stuff away and figure out more storage:)


This is my computer area see still messy I really think that I need a tray to catch all the random junk that flows through my house:) Just messy messy messy. I better get cleaning so I can start my next project:)

Please let me know if you have any tips that will help me keep my area neat and tidy

Happy Scrapin!